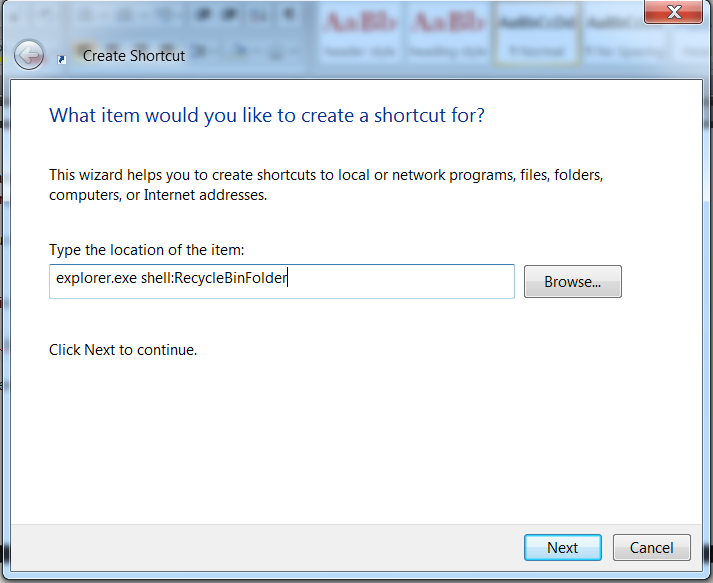
STEP 1: The first thing you want to do is create a new shortcut on the desktop.
STEP 2: Now for the
location type in or copy and paste the following:
explorer.exe shell:RecycleBinFolder
It should look like this…then click the Next button.

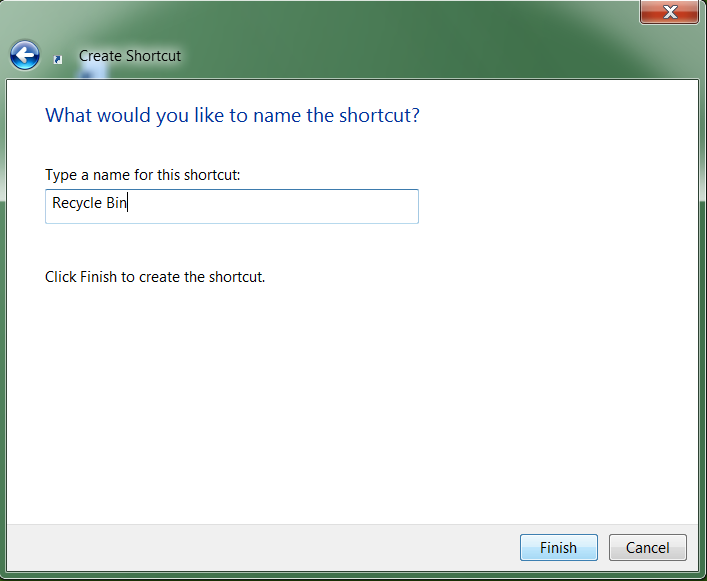
STEP 4: Now name it Recycle Bin or whatever you wish to
call it and click Finish.
STEP 5: Now we need
to change the icon to the look of the Recycle
Bin so right-click the icon and go to Properties. Click on the Change Icon button.
STEP 6: Type or copy
and paste the following into the field for where to look for icons and hit
Enter.
%SystemRoot%\system32\imageres.dll

In the new window of icons just scroll over a bit and find
the Recycle Bin select it and click Ok. Click on Apply and Ok to close out of
the Recycle Bin Properties screen.
STEP 7: you’ll now
have your new Recycle Bin shortcut. You can both drag it to your Taskbar or
right-click and select Pin to Taskbar.
There you go! Now you have the Recycle Bin on the Taskbar,
and if you want to remove it just unpin it.

This gives you another way to quickly access the Recycle
Bin while you are busy multi-tasking. Also, you will probably want to remove
the shortcut you made on the desktop. With this method you can’t drag items
directly to the icon on the Taskbar, but it let’s you open up the bin.


